Google Website Translator Gadget

 
Home Forum Blogs/News JB & Unlock AppleFirmware (1)  (2)  (3) iTunes (1) (2) iDevices-FAQ Links

Sunday, February 24, 2013

Update your iPhone 5 using iTunes

Ensure that you're using the latest version of iTunes.
  • Connect your device to your computer using the included USB cable.
  • After iTunes opens, select your device when it appears in iTunes under Devices.
  • Click "Check for Update" in the Summary pane to check for available updates.

Click here to enlarge

  • If an update is available, iTunes prompts you to download and install the update. Do not disconnect your device until the update has finished.


Click here to enlarge
Update your device wirelessly

  • Make Sure your device is connected to a power source ( Charger or PC Port with USB ). To avoid potential data costs connect your device to a Wi-Fi network.
  • Go to Settings > General > Software Update. iOS will automatically check for available updates.


Click here to enlarge
  • If an update is available* you can tap Download to download the update.
  • After the download has completed tap Install to update your iOS.

Click here to enlarge
  • If you leave the update to download in the background, once the download has finished you will receive a notification saying an update is available for your device. Tapping Details will take you to Settings > General > Software Update. Tap Install Now to install the iOS update. If you decide to leave the installation for later Settings will display notification badge until the update has been installed.


Click here to enlarge

 Emergency Update ( not power On properly or other problem )

In Cause Of Hang First Try Reboot Ur Phone
For reboot U need Press " Home + Power on " For few Second it will Shut Ur Device not Power on it

If Phone Not Power On U want Update Phone User This Guide

Requirements ,

Ensure that you're using the latest version of iTunes.
computer , USB cable And Latest Firmware Download From here

instructions

  • If Ur Phone Is Stuck on Boot or Hang ,Do these Steps .
  • Power of It Using Press " Home + Power On " . Wait Few seconds .
  • Press Only " Home Button " and Insert USB cable make Sure USB attach With Computer properly Directly with out any Hub .
  • Now Phone will Power on in Recovery Mode

Follow same Steps To Update Phone ,


In case of errors feel free to ask help here

About iPhone 5


Click here to enlarge

The iPhone 5

is a touchscreen-based smartphone developed by Apple Inc.. It is the sixth generation of the iPhone and succeeds the iPhone 4S. The phone is a slimmer, lighter model that introduces a higher-resolution, 4-inch screen to the series with 16:9 widescreen aspect ratio. The phone also includes a custom-designed ARMv7 processor called the Apple A6, an update to Apple's mobile operating system known as iOS 6, and support for LTE.
Apple held an event to formally introduce the phone on September 12, 2012. Apple began taking pre-orders on September 14, 2012 and over two million were received within 24 hours. Initial demand for the iPhone 5 exceeded the supply available at launch on September 21, 2012, and has been described by Apple as "extraordinary", with pre-orders having sold twenty times faster than its predecessors. After the launch of the device, Samsung filed a lawsuit against Apple, claiming that the iPhone 5 infringes eight of its patents.
While reception to the iPhone 5 has been generally positive, the new Maps application featured on iOS 6 was negatively received and was reported to contain many serious errors. Consumers and reviewers have noted hardware issues, such as an unintended purple hue in photos taken by the iPhone 5, consumer reports of the coating chipping off, and the presence of light leaks on white variants of the device. Incompatibilities with LTE networks in some regions have been noted.


Specification and features

DESIGN

Smart phone
OS:
iOS ( 6 )
Dimensions:
4.87 x 2.31 x 0.30 inches (123.8 x 58.6 x 7.6 mm)
Weight:
3.95 oz (112 g)
the average is 4.3 oz (124 g)

DISPLAY

Physical size:
4.0 inches
Resolution:
640 x 1136 pixels
Pixel density:
326 ppi
Technology:
IPS LCD
Colors:
16 777 216
Touchscreen:
Capacitive, Multi-touch
Features:
Light sensor, Proximity sensor

BATTERY

Stand-by time:
9.4 days (225 hours)
the average is 19 days (466 h)
Talk time (3G):
8.00 hours
the average is 8 h (497 min)
Capacity:
1440 mAh

HARDWARE

System chip:
Apple A6
Processor:
Dual core, 1300 MHz, Apple Swift
Graphics processor:
PowerVR SGX543MP3
System memory:
1016 MB RAM
Built-in storage:
16 GB , 32 GB Etc

CAMERA

Camera:
8 megapixels
Flash:
LED
Aperture size:
F2.4
Features:
Back-illuminated sensor (BSI), Auto focus, Touch to focus, Digital image stabilization, Face detection, Geo tagging, High Dynamic Range mode (HDR), Panorama
Camcorder:
1920x1080 (1080p HD) (30 fps)
Features:
Video calling, Digital image stabilization
Front-facing camera:
1.2 megapixels

MULTIMEDIA

Music player:
Filter by:
Album, Artist, Genre, Playlists
Features:
Album art cover, Background playback
Speakers:
Earpiece, Loudspeaker
YouTube player:
Yes

INTERNET BROWSING

Browser:

Yes
Built-in online services support:
YouTube (upload)

TECHNOLOGY

CDMA:
800, 1700/2100, 1900 MHz
GSM:
850, 900, 1800, 1900 MHz
UMTS:
850, 900, 1900, 2100 MHz
LTE:
700 MHz Class 13, 850 MHz, 1800 MHz, 1900 MHz, 2100 MHz
Data:
LTE Cat3 Downlink 100 Mbit/s, HSDPA+ (4G) 42.2 Mbit/s, UMTS, EDGE, GPRS, EV-DO Rev.A, EV-DO Rev.B
Positioning:
A-GPS, Glonass, Cell ID, Wi-Fi positioning
Navigation:
Turn-by-turn navigation


Latest Frimware

6.1.2 (5 GSM): iPhone5,1_6.1.2_10B146_Restore.ipsw
6.1.2 (5 GSM+CDMA): iPhone5,2_6.1.2_10B146_Restore.ipsw

User Guide

http://manuals.info.apple.com/en/iphone_user_guide.pdf

Repair Manual

iPhone 5 Repair Manual - iFixit

Friday, February 22, 2013

How to Jailbreak Your Apple TV 2G Using Seas0nPass (Windows) [5.2]

Instructions on how to perform an untethered jailbreak of your second generation Apple TV using Seas0nPass for Windows.

*Before beginning this tutorial you must have already installed the Microsoft .Net Framework which can be found here.

Step One
Download the latest version of SeasonPass from here.

Step Two
Extract the archive you downloaded. Then double click the extracted application to launch it.


Step Three
Click the Create IPSW button from the main screen.


Step Four
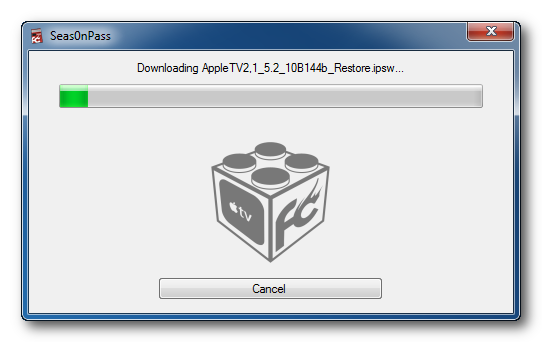
Seas0nPass will now download the latest Apple TV firmware file


Step Five
Seas0nPass will create a custom IPSW file for you.


Step Six
Once your custom IPSW file has been created, Seas0nPass will ask you to connect the Apple TV to your computer via a micro-USB cable and use the remote to put it into DFU mode by holding MENU and PLAY/PAUSE for 7 seconds. The power cable should be unplugged during this process. Tip: Connect the usb cable and press the buttons down at the exact same time.


Step Seven
Once your Apple TV has been detected in DFU mode, Seas0nPass will upload some files, ask you if its okay to automatically restore firmware, and then beginning restoring to the new firmware.


Step Ten
That's it! Your Apple TV is jailbroken!

Thursday, February 21, 2013

Download Evasi0n AIO

How to jailbreak iOS 6.1.2 with evasi0n 1.4

Jailbreak iOS 6.1.2

Evasion 1.4 was just released with support for the recently released iOS 6.1.2, and we’ve got the details on how to use it to jailbreak your iDevice of choice. Although iOS 6.1.2 doesn’t bring any new features to the table, there is a bug fix that makes the upgrade worth it.
Take a look inside as we show you how to jailbreak iOS 6.1.2 with evasi0n 1.4. This tutorial is for the Mac, but the same principal applies across all computing platforms.

Video Tutorial

How to jailbreak iOS 6.1.2

Notes: As always, before we get started, there are a few things to keep in mind here. First, read our jailbreak preparation post. It covers a few vital ideas that should make your life easier when it comes to managing and maintaining your jailbreak.
Be sure that your device’s passcode lock is disabled. The passcode lock can interfere with the jailbreak process. Also, make sure that when you upgraded to iOS 6.1.2, it was done, not via an OTA update, but via an iTunes update. While it’s possible that it will work, OTA updates have caused known problems in the past with regard to jailbreaks, it’s best to just play it safe. Okay, let’s get started!

Step 1: Head over to our download page, and download evasi0n 1.4. The downloads are available for Mac, Windows, or Linux.
Step 2: Save the evasi0n app to your desktop, and run it.
Step 3: Connect your iOS device to evasi0n, and ensure that evasi0n detects your device. Evasi0n should work with any iOS 6 firmware from iOS 6.0 to iOS 6.1.2. In this case, you will be using iOS 6.1.2.
Step 4: Click the jailbreak button, and the jailbreak process will begin. Be patient, as this takes a while. You will notice your device reboot several times throughout the entire process. The main thing is just to be patient.
Step 5: Eventually, evasi0n will ask you to unlock your device, and tap the Jailbreak icon on your Home screen once. Follow these instructions, ensuring that you tap the icon only one time, and then leave the device alone and let it continue.
Step 6: The evasi0n app will complete its course, and you will be able to click the Exit button. The iOS device, however, still needs to finish up a few additional steps, so again, be patient and don’t touch your device.
Step 7: Eventually, the jailbreak will finish, and you can unlock your iOS device, and open the Cydia app on your Home screen. Cydia will need to initialize, which takes about 1 to 2 minutes. After the initialization is complete, the device will respring again.
Step 8: Reopen Cydia, select Hacker, and begin enjoying your newly jailbroken iOS device running iOS 6.1.2.

Remember, this is an untethered jailbreak, so you can feel free to reboot your device at will. Also, remember to take the necesarry steps to protect your jailbreak. you can do so by reading our post that describes how to protect device.

Be sure to let me know what you think in the comment section below if you have any questions, comments, or concerns regarding this latest update to evasi0n.

Thursday, February 7, 2013

evasi0n iOS 6.x Jailbreak Untethered Errors And Fixes [FAQ]

Click here to enlarge
As we are covering the official evad3rs updates on this website, lots of emails are stacking up on my email account related to errors and troubleshooting the evasi0n jailbreak tool. As the evad3rs have been very busy compiling the evasi0n jailbreak for all of us, they have had very less time to deal with all the errors that are popping around with the use of this tool. As I have tested this tool, overall it goes on pretty smoothly without any errors. Hit the jump to fix and troubleshoot the errors related to evasi0n tool.


Click here to enlarge

.
Error 1: Cydia not loading up and cydia packages not installing


Cydia related errors in evasi0n are currently happening due to intense server overload on the cydia's servers. Saurik is onto it and is busy fixing this issue. It is not caused by some technical problem in your idevice rather it is occuring simply due to millions of people are trying to access Cydia at the same point of time. See this tweet from Saurik below..


Update : Cydia Telesphoreo repo has been fixed, you can access it now if you still can’t, change your DNS to Google’s 8.8.8.8 server and try to access it again.


Error 2: Does evasi0n support OTA update


No, If you updated to iOS 6.1 via OTA (over-the-air update) it won't work on your idevice. Here's a quick solution :


Step 1: Firstly make a full backup of your device

Step 2: Update to iOS 6.1 using iTunes


Error 3: evasi0n does not work and fails everytime

It is happening because you have a passcode enabled on your idevice or you have left iTunes
running during the jailbreaking process. Here's the fix..


  • Disable the passcode lock on your idevice
  • Don't touch your computer while evasi0n is running


Error 4: evasi0n gets stuck on “patching kernel”


If your idevice gets stuck on displaying “patching kernel” don't worry, be patient as it takes time as long as 15 minutes Click here to enlarge. If it still doesn't progress, press Power+Home button for a long time to force a reboot. Then again jailbreak your idevice from the very beginning. See the tweet by pod2g below.


Error 5 : evasi0n doesn't recognize my idevice

Although it's working fine on every idevice as I have personally tested it. Make sure your idevice is supported, see the official list below.


  • iPhone 3GS
  • iPhone 4,4S
  • iPhone 5
  • iPod Touch 4th Generation
  • iPod Touch 5th Generation
  • iPad 2
  • iPad with Retina Display 3rd and 4th Generation
  • iPad Mini

As of now, any generation of the Apple TV is not supported. If it still doesn't work, restart your computer system or try to switch the USB ports, as they can cause havoc sometimes.


Error 6: evasi0n is stuck on "finding offsets"


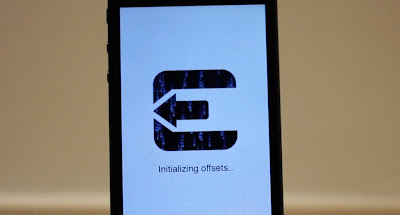
This part of the jailbreak process takes a bit of time like around 8-10 minutes. If you still see no progress, do a Power+Home button force reboot your idevice.


Error 7: Jailbreak button appears to be grey/disabled, when the idevice is connected


This occurs because your iTunes backup is not protected by a password. You need to re-enable password protected backups again once the jailbreak process gets over.


Error 8: Weather app bug


If you have an iPad, an extra Weather app will appear after the jailbreak is completely finished. It is just hidden in a .plist extension configuration file. The evad3rs dev team member David Wang aka planetbeing is currently working on this bug fix with a Cydia patch obviously. See the below tweet from musclenerd...


Update : Fix the weather app not working error/bug by installing 2 cydia packages, details here or by re-jailbreaking with the updated version of the tool here.


Click here to enlarge


Error 9: idevice freezes and gets stuck at Apple logo on booting


This problem is because of a random boot bug or it might be occuring due to an incompatible tweak. You can use any of the 3 solutions given below..


  • Hold Power+Home buttons to force reboot your idevice and it should work normally with the next reboot.
  • If it still doesn't work, try increasing the volume while booting
  • Uninstall Activator and Sbsettings tweaks

Update : You can fix the long reboot bug through Cydia here or by jailbreaking again with the updated version of the tool, see the how-to guide here.


Error 10: idevice displaying wrong time zone and time after evasi0n jailbreak

As we are always updating this article with latest errors and bug fixes. We have been seeing a new bug that involves the wrong time zone and time after using evasi0n tool. To fix the incorrect time error toggle “Set Automatically” option to OFF. For the wrong time zone, follow this method below...


Step 1: Navigate to Settings > General > Date and Time > Set Automatically > ON

Step 2: Now you need to go back again to Settings > Privacy > Location Services (ensure it’s set to on) > System Services > Setting Time Zone. Set this option to ON.


Click here to enlarge


Error 11: Cydia appears small after rebooting (quarter screen bug)?

This error or bug is known as the quarter screen bug. This bug looks like this on an iPad and iPhone (shown below).

Click here to enlarge

Click here to enlarge

A lot of users are reporting this quarter screen bug. The root cause of this is that you might have installed an tweak incompatible with iOS 6 running on your idevice. Follow the method given below to solve the issue.

Step 1: Firstly we need to disable all the tweaks. Reboot your idevice while holding the volume up button. .

Step 2: Launch Cydia and uninstall all iOS 6 incompatible tweaks.

If this doesn't work for you, to use Cydia again, just respring your idevice. However, this fix is not a permanent solution, it will again cause the same problem after a reboot.


Download evasi0n
evasion jailbreak Tutorials : Mac, Windows
Facing problems, ask us Click here to enlarge

If you are still experiencing troubles take a look at these tips as this will likely fix your troubles and errors.


  • Disable the passcode on your iPhone, iPad or iPod touch.
  • DO NOT run itunes, tinyumbrella, xcode or any other idevice tools when you are jailbreaking.
  • If you ever get stuck, it’s completely safe to restart the evasi0n tool and force reboot your idevice using Power+Home button.
  • If it still doesn't work, make a fresh restore of iOS 6.1 and retry again .

Monday, February 4, 2013

evasi0n - iOS 6.x Jailbreak

picture of iOS 6 compatible devices
download for Linux download for Mac OS X download for Windows
Compatible with all iPhone, iPod touch, iPad and iPad mini models running iOS 6.0 through 6.1 

Official Mirrors

Server OS Link
box.net Linux SHA1: c9e4b15a161b89f0e412721f471c5f8559b6054f
Mac OS X SHA1: 23f99a0d65e71fd79ff072b227f0ecb176f0ffa8
Windows SHA1: 2ff288e1798b4711020e9dd7f26480e57704d8b2
MEGA Linux SHA1: c9e4b15a161b89f0e412721f471c5f8559b6054f
Mac OS X SHA1: 23f99a0d65e71fd79ff072b227f0ecb176f0ffa8
Windows SHA1: 2ff288e1798b4711020e9dd7f26480e57704d8b2
RapidShare Linux SHA1: c9e4b15a161b89f0e412721f471c5f8559b6054f
Mac OS X SHA1: 23f99a0d65e71fd79ff072b227f0ecb176f0ffa8
Windows SHA1: 2ff288e1798b4711020e9dd7f26480e57704d8b2

Requirements

  • 5 minutes of your time!
  • A computer, running Windows (XP minimum), Mac OS X (10.5 minimum) or Linux (x86 / x86_64)
  • An iPhone, iPad or iPod running iOS 6.0 through 6.1 (you may check in Settings / General / About => Version)
  • A USB cable to connect the device to the computer

Important! Read me!

  • Backup your device using iTunes (or iCloud) before using evasi0n. If something breaks, you'll always be able to recover your data.
  • Please disable the lock passcode of your iOS device before using evasi0n. It can cause issues.
  • Avoid all iOS and iTunes related tasks until evasi0n is complete. Why not just enjoy a brief break from the computer to stretch your legs?
  • If the process gets stuck somewhere, it's safe to restart the program, reboot the device (if necessary by holding down Power and Home until it shuts down), and rerun the process.
  • If you get an error on OS X 10.8 saying that evasi0n can't be opened, control-click (or right-click) the app and on the revealed context menu, choose 'Open.' On the ensuing dialogue box, choose 'Open' as well.
Related Posts Plugin for WordPress, Blogger...