How to Install Siri Proxy - A Step-By-Step Tutorial
The developer of SiriProxy, @plamoni, made a video on how to install SiriProxy on Ubuntu 11.10. If you don’t have Ubuntu, you can easily create a virtual machine on your PC or Mac with VirtualBox.
Update #3: The b3 version of redsn0w fixes a problem where re-running redsn0w over an existing jailbreak would cause MobileSubstrate-based apps to stop running until MS was installed again. Now you can re-run the redsn0w jailbreak step without worrying about that (but still remember to de-select the “Install Cydia” option if it’s already installed).
TIP: If auto-detection fails and redsn0w tells you no identifying data was found, you can always pre-select the appropriate 5.0.1 IPSW using “Extras->Select IPSW
Following our multiple looks at private Siri ports to unsupported iOS 5 devices with the help of developer Steven Troughton-Smith, Chpwn and Ryan Petrich went public today with a Siri port called Spire.
The port mirrors all the iPhone 4S Siri functionality and works on the jailbroken iPhone 4, iPhone 3GS, third generation iPod touch, fourth generation iPod touch, and first generation iPad. We previously revealed that iPod touch Siri performance is not on par with iPhone Siri performance due to the lower quality microphone system.
Spire is available free on the Cydia jailbroken application market, and the download comes in at approximately 100mb, according to a blog post from Chpwn. The developers recommend that users connect to a Wi-Fi network for downloading, not a standard cellular network, because of the large file size.
A few Siri ports have gone public through jailbreak application markets in the past few weeks, but they were deemed unsafe and illegal by the development community due to its distribution of Apple copyrighted materials.
“Spire uses a new method to obtain the files necessary for Siri, so it doesn’t have the copyright issues encountered by previous attempts,” said Chpwn
Of course, with any port of this kind, there will be a caveat: you have to still gain authorization through your own server and an iPhone 4S. Chpwn explained the issue:
However, Spire is not a complete solution. Apple still requires authorization to use Siri, so information from an iPhone 4S is still required. To insert this information, Spire allows you to enter your own proxy server address. By using this (ancient) SiriProxy fork, you can setup a proxy using your own iPhone 4S to insert the needed information reasonably easily. Other solutions for proxying Siri will be listed here as they are developed — perhaps that sort of proxy might be included in the main SiriProxy repository.
“Until the iPhone 4S is jailbroken, this is the best Siri port,” said Steven Troughton-Smith, “when the iPhone 4S is jailbroken, then we can avoid the proxy server issues.” Spire can be downloaded from this link, if you are on a jailbroken iOS 5 devices.
Jailbreak 5.0.1 untethered now became a reality. The iPhone Dev-team has just pushed Redsn0w 0.9.10 b1 to jailbreak 5.0.1 untethered on iPhone 4, 3GS, iPod touch 4G, 3G and iPad 1. Pod2g was the guy behind 5.0.1 untethered jailbreak, as he handed over his project to both Chronic Dev-team and iPhone Dev-team. The two teams have made a major task on 5.0.1 untethered jailbreak. iPhone Dev-team have put 5.0.1 untethered in to RedsnOw 0.9.10 b1 and PwnageTool. Chronic Dev-team put untethered 5.0.1 jailbreak into a Cydia package, thanks Pod2g and the both teams for making us happy.
Before starting to jailbreak 5.0.1untethered on iPhone 4, 3GS, iPod touch 4G, 3G and iPad - You have to know this :
If you have one of those devices and are not on 5.0.1 yet, update now! The SHSH window is still open for 5.0.1 If you unlock via ultrasn0w or gevey, make sure you only get to 5.0.1 via a custom IPSW! Once you’re at 5.0.1, use the latest redsn0w 0.9.10 to both jailbreak and untether.
If you’re already at 5.0.1 with a tethered jailbreak, you have two choices: either run redsn0w 0.9.10 over your current jailbreak (deselect “Install Cydia” if you do that), or install the Cydia package prepared by the chronic devteam. The patches are the same regardless of which you choose.
Some of you are using a hybrid 5.0/5.0.1 configuration. If so, do not attempt to install this untether over that setup! You will most likely get into a reboot cycle. Do a sync and fresh restore to 5.0.1 then install the jailbreak + untether.
How to jailbreak 5.0.1 untethered iPhone 4, 3GS, iPod touch 4G, 3G, iPad 1 - [Tutorial]
Required Downloads :
Download Redsn0w 0.9.10 - Windows (be sure to run in Administrator mode)
Download iOS 5.0.1 ipsw for iPhone, iPod touch or iPad
Download iTunes
Step by Step guide :
Step 1: Connect your iDevice with your PC via USB, and open iTunes then Restore to iOS 5.0.1 (If you are already running iOS 5.0.1, bypass this step)
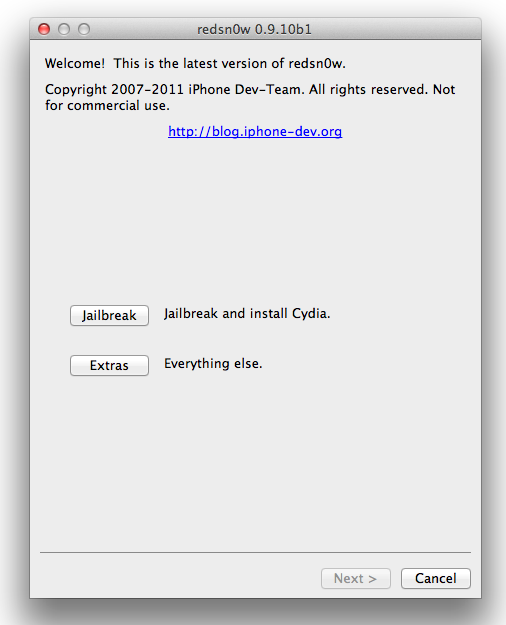
Step 2: Start Redsn0w 0.9.10 b1, and press on "Jailbreak" button
Step 3: Now select “Install Cydia” and click “Next”.
Step 4: Now make sure your device is both OFF and PLUGGED IN to the computer before you click “Next”.
At this stage you will be presented with a screen where you will be guided on how to enter DFU mode. Quickly hold “Power” button and then while holding the “Power” button, you will now have to hold “Home” button too. Now after few seconds release “Power” button but keep holding “Home” button until installation begins.
Download iOS 5.1 firmware beta 2 for developers. Apple has just seeded iOS 5.1 beta 2 for developers with build number 9B5127c. The major update on iOS 5.1 beta 2 is the feature related to the management of photos in the Photo Stream.
NEW: Photos taken using iOS 5.1 can be deleted from Photo Stream on your device and will be removed automatically from Photo Stream on your other iOS 5.1 devices. Older photos can be manually deleted from your iOS 5.1 devices.
Along with iOS 5.1 for iPhone 4S, 4, 3GS, iPod touch 4G, 3G, iPad 2 and iPad 1, Apple released new version of Xcode 4.3 and Apple TV. Download iOS 5.1 Beta 2 for iPhone 4S, 4, 3GS, iPod Touch 4G, 3G, iPad 2, 1 (Developers Only)
Good news, jailbreakers! Pod2g today confirmed that his iOS 5 untethered jailbreak demoed few days ago on iPod touch 4G is working on iPhone 4 running iOS 5.0.1. The news comes from pod2g’s Twitter timeline who invites users to update to iOS 5.0.1 in case they want to.
Got an untethered iPhone 4 running iOS 5.0.1. Feel free to update.
Pod2g has previously warned users from upgrading to iOS 5.0.1 and give him time so he can use the discovered security flaw found in iOS 5.
Since his jailbreak is currently working on iPhone 4 iOS 5.0.1, you can feel free to upgrade.
Next step now is to test the untethered jailbreak on the A5 devices as the iPhone 4S and iPad 2. If the jailbreak is a new exploit, then it will most probably work on the devices. If it’s a big that changes tethered to untethered based on limera1n’s exploit, then it won’t work.
There’s currently no release time for this jailbreak. We’ll be back with more news once we get it. Stay tuned!
Source : iOS 5.0.1 Untethered Jailbreak Confirmed Working On iPhone 4 ~ iPhonworld.com
I highly recommend using iFaith to dump SHSH from your phone and create a custom ipsw same version with the existing one in the phone!!!
If that fails for whatever reason there might be a tiny chance to find SHSH on Apple or Cydia servers to fit your needs...
First of all connect your iPhone to computer and put it in Recovery Mode.
Use ECID Grabber (attachment) to get the device ECID. After getting it, copy it to clipboard.
In TinyUmbrella click "Manual ECID". Chose a name in first tab of the little window that opens. In second tab paste previously copyed ECID. In the third tab chose your iDevice type (iPhone3G,....iPhone4...etc). Now click "Create custom device". Your newly created custom device will appear in the left side of TinyUmbrella window in "Custom devices" group. Click on it then hit "Save ALL SHSHs". Give the program some time to communicate with Apple servers and check wheter or not there are SHSHs for your iPhone. After procedure is completed you should check in TinyUmbrella's "Advanced" tab "Request SHSH from Cydia". If you're lucky it might find something there too.
Now that u have some SHSH saved for your device is time to decide which one you'll use to do a custom restore. If we're talking of iPhone4, ANY shsh higher than 4.3.5 version will be USELESS because for now only basebands lower (or equal) then 04.10 are unlockable using Gevey. So...
Hope you're lucky and have those shsh. If yes:
IREB-pawned dfu,
TinyUmbrella-start tss server
iTunes-shift+restore-select coresponding ipsw(stock or sn0wbreeze customized)-restore
You should have a Working phone without any code and with an unlockable baseband.
Apple Mac PC’s are much faster, elegant than the windows PC but there is one great thing about windows PC’s which can’t be denied, it is that, Windows OS has a very large collection of apps as compared to the Mac OS. if you are a Mac user then you shouldn’t need to be worry now, as now you can run any Windows app on your Mac OS using WinOnX.
All you need to have a Mac OS 10.6 or higher to install this program. WinOnX is an amazing must have emulator for Mac OS and it can be downloaded from MacApp store for just $4.99.
How to Run Windows Programs on Mac OS X using WinOnX :
Step 1: The first is to download and install WinOnX from the Mac App store.
Step 2: Download and install any Windows app that you want to run on your Mac OS.
Step 3: The last step is to locate the program on your Mac. Double click on it and start enjoying Windows app on your Mac OS.
Well, in this way you can use any windows app on your Mac OS for just $4.99.
A couple of weeks ago, plamoni’s has released Siri Proxy and we’ve seen quite a few plugins that will extend our Siri experience. Today, we’re going to show you how to install Siri Proxy so you can take advantage of all these plugins. Head over the break to start…
NOTE: major duh moment – this is for iPhone 4S. Siri was fully ported to *older* devices, but NOT being distributed. It’s illegal. Don’t believe all the hype.
1. Download Siri Proxy
2. Download and install Mac Ports
3 Open Terminal and type : sudo port install dnsmasq . Type in your computer’s password
4. Type bash < <(curl -s https://raw.github.com/wayneeseguin/.../rvm-installer) to download/install RVM
5. Type [[ -s "$HOME/.rvm/scripts/rvm" ]] && . “$HOME/.rvm/scripts/rvm” to activate RVM 6. Type echo ‘[[ -s "$HOME/.rvm/scripts/rvm" ]] && . “$HOME/.rvm/scripts/rvm” # Load RVM function’ >> ~/.bash_profile to add RVM to your .bash_profile
7. Type rvm install 1.9.3 to install Ruby 1.9.3
8. Some users might get an error while installing Ruby. This only applies to *some* Lion users. 9. If you get this error, type rvm install 1.9.3 –with-gcc=clang
10. Type rvm use 1.9.3 –default to set RVM to use/default to 1.9.3
11. Now you need to cd into the the siri proxy folder you downloaded at step 1 ( make sure you unzipped it first ). The easiest way is to type cd and then just drag-and-drop the folder from your desktop ( or downloads location – whatever it may be ) to your terminal shell.
12. Type rvmsudo gem install rake bundler to install Rake and Bundler. Type in your computer password
13. Type rake install to Install SiriProxy gem
14. Type mkdir ~/.siriproxy to make .siriproxy directory
15. Type cp ./config.example.yml ~/.siriproxy/config.yml to move default config file to .siriproxy
16. Type sudo port install openssl
17. Type ./siriproxy gencerts to generate certificates
18. Next you need to install ca.pem onto your iPhone. To do that open a finder window, press cmd+shift+G and enter the following path ~/.siriproxy
19. Email ca.pem to yourself
20. On your phone you will see the new file. Tap on it and install it.
21. Search your Mac for this file: dnsmasq.conf. Once you’ve found it, open it in a texteditor ( we suggest TextWrangler – free ). Inside the file find #address=double-click.net/127.0.0.1( line 62 ). Right below that, add the following line: address=/guzzoni.apple.com/your-computer-IP 21.1 Type in terminal sudo dnsmasq . Check activity monitor if dnsmasq is running ( all processes )
22. On your iPhone, open Settings.app. Go to WiFi, select your WiFi, and edit your DNS. Should be something like 10.0.1.0. You need to change the last 0 into a 3. ( i.e 10.0.1.3 )
23. Now you need to cd into the bin folder found in the plamoni-SiriProxy-fe75db4 you downloaded at step 1. To do that type cd and drag-and-drop the bin folder into the terminal
24. Type ./siriproxy bundle
25. Type rvmsudo siriproxy server and type your password.
26. Now everything should be up and running. To test it, fire up Siri and say ‘Test Siri Proxy’
27. Now the fun part. All the plugins that makes Siri Proxy magic. We will show you where to get plugins and how to install them in the next
=======================
HOW TO: Install Siri Proxy Plugins
In a nutshell, Siri Proxy is retarded. There’s so much potential here, and devs all over the world have already created amazing plugins for it. In our previous post, we showed you how to install Siri Proxy, now let’s see how to install plugins for it.
1. Go to plamoni’s github and check out the available plugins. Most of them come with a video demo so you know how to use them.
2. Download any plugin that you want/need. For this tutorial we’re going to use the twitter plugin.
3. Download the plugin and unzip it.
4. Rename the folder to siriproxy-twitter
5. Copy siriproxy-twitter to /…/plamoni-SiriProxy-fe75db4/plugins/
6. Open a Finder window, hit cmd+shift+G and browse to the following path ~/.siriproxy
7. Open config.yml in TextEdit
8. Now here’s where it gets tricky. First you need to duplicate the given example
Before saving the file, MAKE SURE the newly added lines are perfectly aligned with the example above. If you fail this step, you will get a bunch of errors.
9. Open Terminal
10. Now you need to cd into the bin folder found in the plamoni-SiriProxy-fe75db4. To do that type cd and drag-and-drop the bin folder into the terminal
11. Type ./siriproxy bundle . You need to do this every time you change plugin configurations to update required gems.
12. Type rvmsudo /.siriproxy server and type your password.
13. Now, fire up Siri and say Tweet followed by whatever you want to tweet.
NOTE: this plugin won’t let you tweet until you go to twitter.com/apps and get the oauth credentials and put them in config.yml. This tutorial shows you how to install a plugin, not use a plugin to tweet using Siri. Just saying…
Promising news for iOS 5 / 5.0.1 untethered jailbreak. Joshua Hill who is also known as p0sixninja and is the front man for the Chronic Dev Team has reported a landmark of crash reports that have been received by his team. The Chronic Dev Team recently launched a new app that tends to collect the iOS crash reports in iTunes and then sends them to their private servers in order for them to find exploits in the future iOS 5 untethered jailbreak.
In about a week, the team has collected over 10 million crash reports from jailbreak supporters from around the world. The Chronic Dev Team is working to parse the cash reports data that they have received to create a stable and untethered jailbreak for Apple’s iOS 5.
In one of his most recent tweets, Joshua Hill has announced that 10,071,868 crash reports have been uploaded to the servers the Chronic Dev Team are using, since the tool for collecting the data was releases last Sunday.
Google’s MapReduce software is being used by the team to compute the large amount of crash report data that is being sent in by jail breakers from around the world. This software, according to Joshua Hill allows his team to run tests in seconds rather than days, if done by normal methods.
The iOS 5, the iPhone 4S and iPad2 still don’t have an ETA on an official untethered jailbreak. But the submitted number of crash reports is a kind of a testament that tells about how committed the jailbreak community is in making Chronic Dev Crash jailbreak into a reality. Important iOS 5 exploits have already been found but according to Joshua they are under a strong guard until the right time presents itself to show these exploits
Ac1dSn0w Beta 2 CHANGELOG: Beta1: Initial Version Beta2: Fixed legal issue Fixed problems with ramdisk (black screen) Removed boot logo Supported Devices (iOS5/iOS5.0.1): iPhone 3Gs iPhone 4 iPod Touch 4 G iPad 1 It also provides features like Tethered Boot, Pwned DFU, and Exit Recovery to get your device out of Recovery Loop. You may have to perform the following steps in order to jailbreak your device successfully. 1. Download Ac1dSn0w from Here and Mirror (b2) 2. After downloading, open it and you’ll see the following screen: Note: You can click ‘Show Console’ to see some device related information. It also shows you the current state of your jailbreaking process. The Assistant Panel helps you to put your device into DFU Mode. 3. Connect your device with your Mac. 4. Turn your device off. 5. Click ‘Show Assistant’ and follow the onscreen instructions to enter DFU Mode. 6 . Once you’re in DFU Mode just hit the ‘Jailbreak’ Button and wait until it’s done (the device will reboot). 7. Put your device again into DFU Mode (Step 5) and hit the ‘Tethered Boot’ Button. 8. Please wait a moment or 2 for the a white Cydia icon to appear. 9. Click on the white icon and wait for Cydia to initialise and close. Done: Reopen Cydia Your device should now be jailbroken with Cydia installed. [REMARK] Please note that you need to boot tethered in order to see the Cydia icon. Also note that Ac1dSn0w won’t show a boot logo in Beta2.
Yes you can, that’s right you can run “Install (Port) Siri On iPhone 4 And iPod Touch” Siri on your iPhone 4 and iPod touch right now, and here you are the full guide.
Siri
Well, first know that my dear reader, this full port of Siri for iPhone 4 GSM & CDMA version and iPod touch too but other iDevices not supported yet. If you installed “Siri0us” you should remove it before install Siri. How To Install (Port) Siri On iPhone 4 And iPod Touch
CD-Team developed a tweak called “H1Siri” which can bring Siri GUI and Siri connectivity to the team’s service, Siri will be connected to private service which maybe answer you from his mind “wrong answer” not Apple’s service.
1- Download iOS 5 / iOS 5.0.1 to run on iPhone 4 or iPod touch, you can download fromhere.
2- Jailbreak your iPhone 4 or iPod touch 4G, simply follow our tutorial posted here.
3- Now open Cydia then Mange => Sources => Edit => Add.
4- Get back to Cydia and start searching for H1Siri and install it, know that it weights 109 MB so that it’s going to take some more time.
5- After installation reboot your iDevice.
6- Open Settings => General => Siri => On.
Install (Port) Siri On iPhone 4 And iPod Touch
Note: iTechNow.Com is not to be held responsible for any loss of data as a result of the malfunctioning of your device in the following of this guide. Follow at your own risk.
WARNING
Don’t Do It! New Siri Port H1Siri Is Illegal, Breaks Your iPhone iPhone jailbreakers should probably stay away from the latest Siri port, dubbed H1Siri, which brings Apple’s digital assistant to the iPhone 4. The new hack comes from a group of Chinese hackers calling themselves the “CD-Dev Team.” According to the team’s account on Weibo (a Chinese microblogging service similar to Twitter), the hackers had originally wanted to just run a small test, but the code was leaked. Now their servers can’t keep up with the demand.
But beyond server unresponsiveness, there are several other good reasons to skip this hack, including the fact that it seems to break people’s phones and involves running illegal code.
H1Siri (aka, Hi Siri!), for those of you tracking the Siri-hacking space, is a different hack from the one that emerged in October and the other arriving last month.
According to iDownloadBlog, which wisely advises readers to be wary of this new port after its own tests with H1Siri failed, the new port involves the use of copyrighted binaries from the iPhone 4S. Simply put, it works because it uses illegal code. Notable iPhone hacker @chpwn (Grant Paul), confirms this.
He also points out another good reason to think carefully before installing H1Siri on your iPhone 4: it gives the software’s creators access to your personal data:
Those are all very good reasons to avoid H1Siri, but if your Siri lust can’t be assuaged, maybe this last bit of info will: the darned thing doesn’t really work.
Numerous posts from brave (crazy) early adopters report various complaints after installing. For example, it has been said to cause random reboots, break the camera, brick the phone, mess up the Settings app, cause the phone to get stuck at the Apple logo and other such things.
We know Apple previously tested Siri on iPhone 4 and older devices but hasn’t enabled the voice recognition software to work on customers’ iOS devices released before the iPhone 4S. Meanwhile however, the hacking community cracked Apple’s digital secretary to work on jailbroken devices and ported the dictation feature to iPhone 4. And now, it looks like a Chinese hacker group called CD-Team was able to create the first fully-featured Siri port. Called H1Siri, it’s already available on Cydia, a third-party store carrying unsanctioned software for jailbroken devices. The hack lets you use the full range of Siri features on both jailbroken fourth-generation iPod touch and GSM/CDMA iPhone 4 running either iOS 5.0 or the latest 5.0.1 version.
According to iClarified, the 100MB download is available via both Cydia.be and iphone3gsystem.fr/cydia repositories (select Manage > Sources > Edit in Cydia, add the sources and do a search for H1Siri). Be advised that H1Siri comes from a relatively unknown party and contains cracks so it’s likely illegal. Also note it passes your personal information to a shady third-party server. If you’re interested, a how-to guide is available here. Some think the hack takes advantage of SiriProxy, a proxy server that fools Siri into believing it is talking to Apple’s servers.
Please note that we couldn’t determine at press time the magic behind this tweak and some users reported intermittent connectivity issues, another indication of H1Siri talking to a third-party proxy server rather than communicate with the Apple cloud directly. The Siri Proxy project has been used to enable interesting uses, from managing a radio-controlled thermostat to controlling your Plex media center to starting your car.
As for jailbreaking, those waiting for an untethered iOS 5 jailbreak will be happy to know that a new tool is now available for easy downgrading to iOS 5.0…
Called iFaith, a Windows application, it lets you circumvent Apple’s restricted downgrade system which prevents people from downgrading their devices to an older iOS 5.x firmware. The new version, iFaith 1.4, works around that Apple-imposed limitation by permitting unsigned restores based on dumped iOS 5 signature hash blobs. This is important because, as noted by MuscleNerd, an upcoming untethered iOS 5 jailbreak might require iFait for user restores. According to the iFaith developer, iH8sn0w, it is possible to restore to iOS 5.0.1 and preserve iPhone 4 baseband by dumping the blobs with iFaith first. The tool does not support A5 devices yet. Because the sn0wbreeze tool (another iH8sn0w’s creation) isn’t capable of iFaith blobs yet, users are advised to use the redsn0w app. More information in iH8sn0w’s video tour included below. As for Siri, an iPhone 4S exclusive that currently understands and can speak English, French and German, Apple says “in 2012, Siri will support additional languages, including Japanese, Chinese, Korean, Italian, and Spanish”. Apple’s language technologies engineers are already hard at work developing Siri for the Chinese market.
These are instructions on how to jailbreak your Apple TV 2G on iOS 4.4.3 using Seas0nPass. Please note this a tethered jailbreak and will require the help of a computer to reboot your device if it's powered off.
Step One
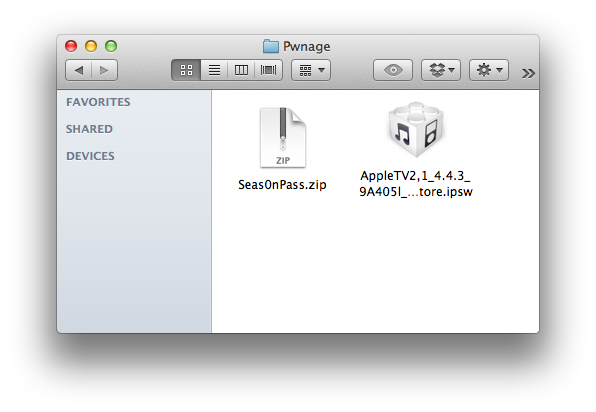
Create a Pwnage folder on your desktop. Download and place the latest version of Seas0nPass and the Apple TV 4.4.3 firmware ipsw into the folder.
- Seas0nPass
- Apple TV Firmware
Step Two
Double click the Seas0nPass archive to extract it. Then double click the extracted Seas0nPass application to launch it.
Step Three
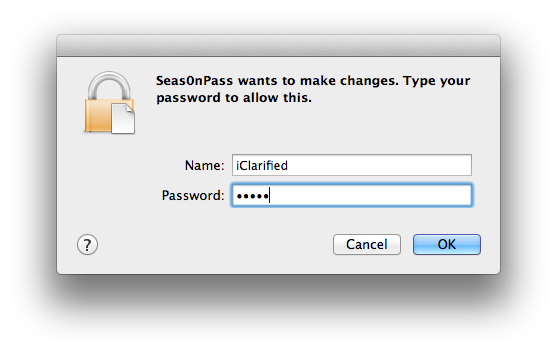
When prompted, input your administrative username and password then click the OK button.
Step Four
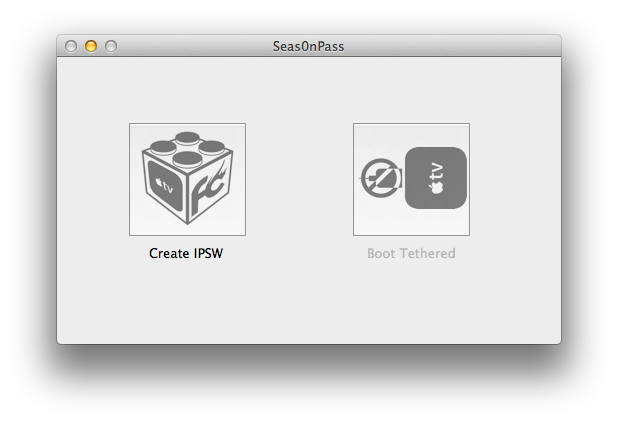
Hold down the Option key and click the Create IPSW button.
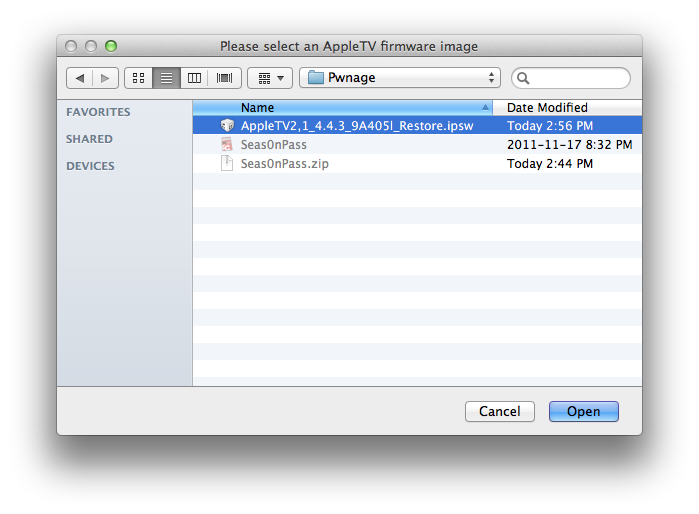
Step Five
Select the Apple TV ipsw from the Pwnage folder on your desktop and click the Open button.
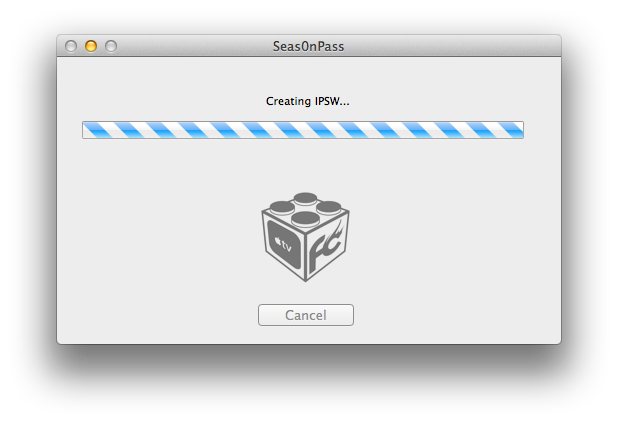
Step Six
Seas0nPass will now prepare your custom IPSW.
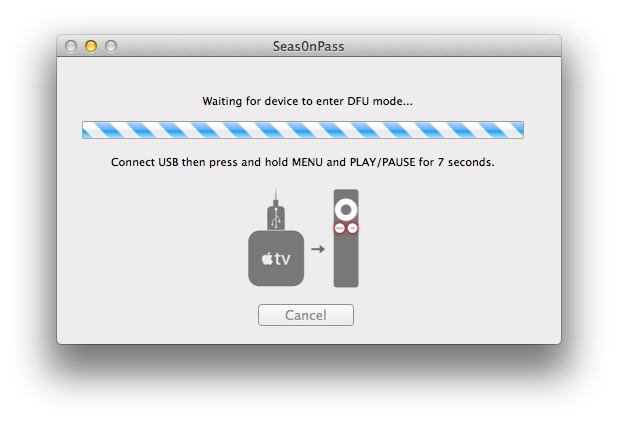
Step Seven
Once your custom IPSW file has been created, Seas0nPass will ask you to connect the Apple TV to your computer via a micro-USB cable and use the remote to put it into DFU mode by holding MENU and PLAY/PAUSE for 7 seconds. The power cable should be unplugged during this process. Immediately hold the buttons after inserting the USB cable.
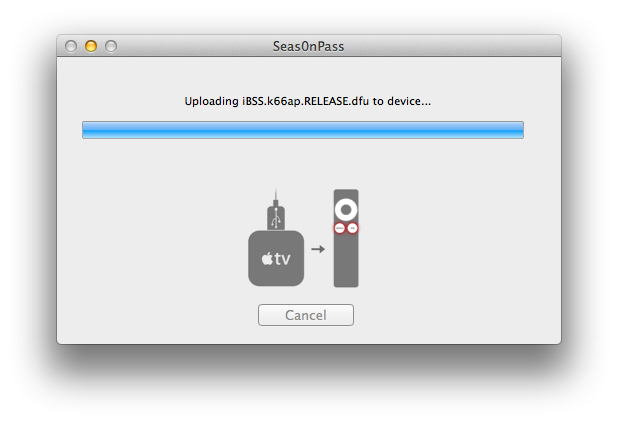
Step Eight
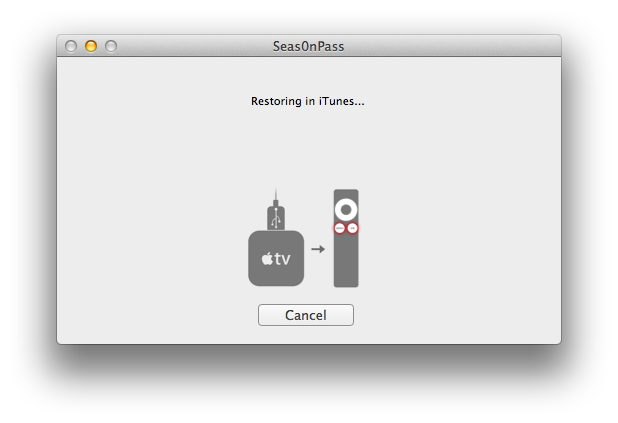
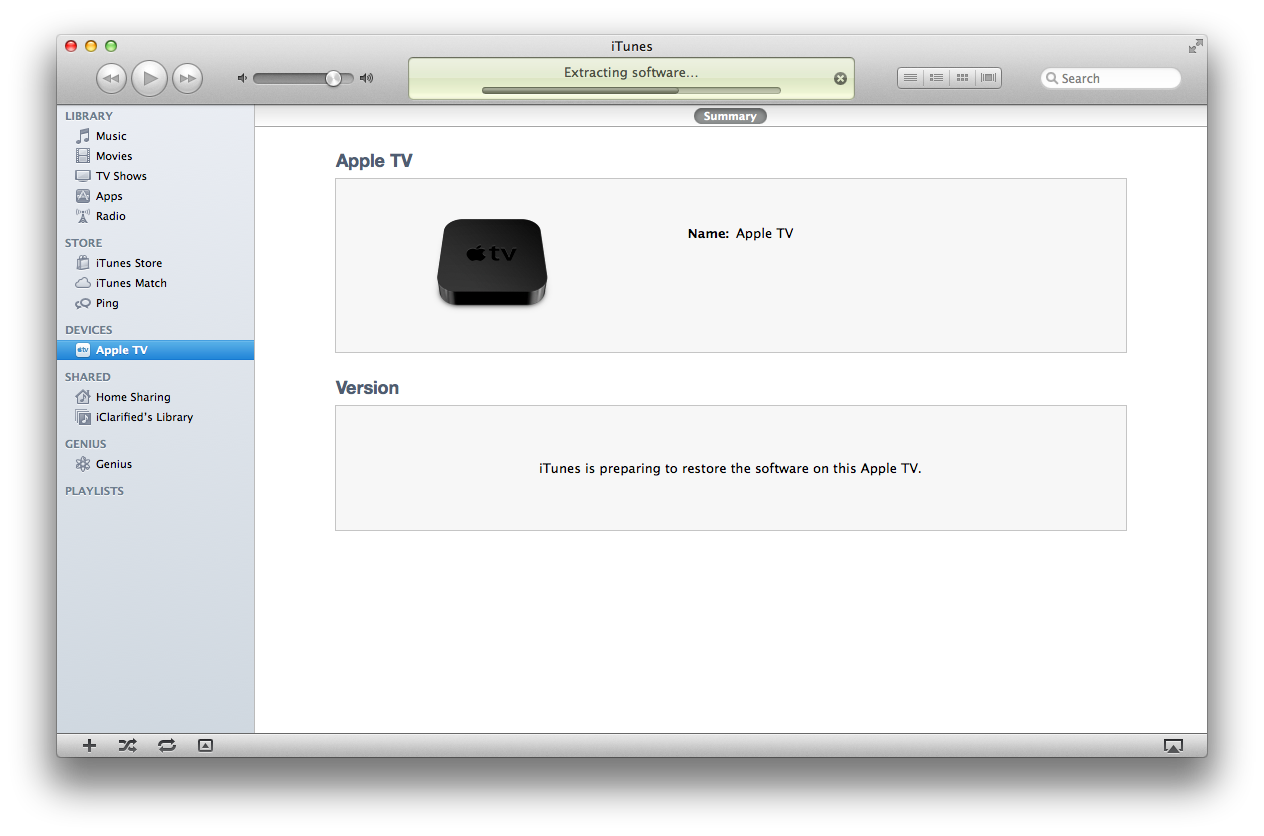
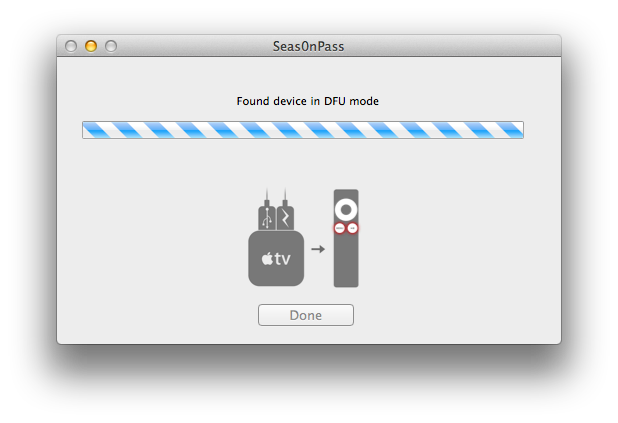
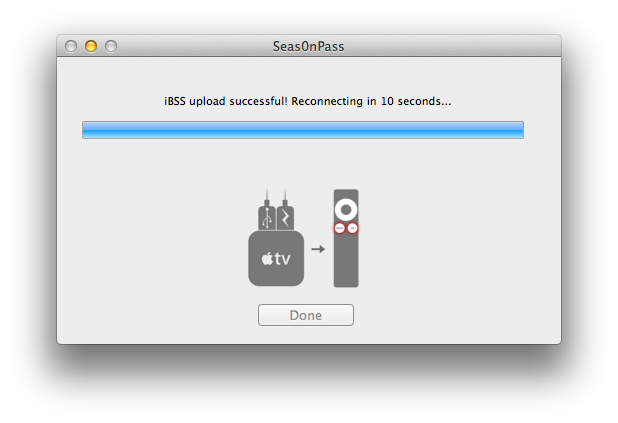
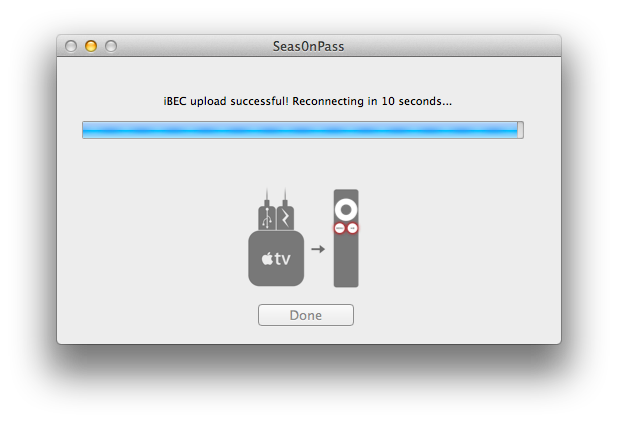
Once your Apple TV has been detected in DFU mode, Seas0nPass will upload some files, automatically launch iTunes, and beginning restoring to the new firmware.
BOOT TETHERED
To boot your Apple TV you will need to follow these instructions.
Step One
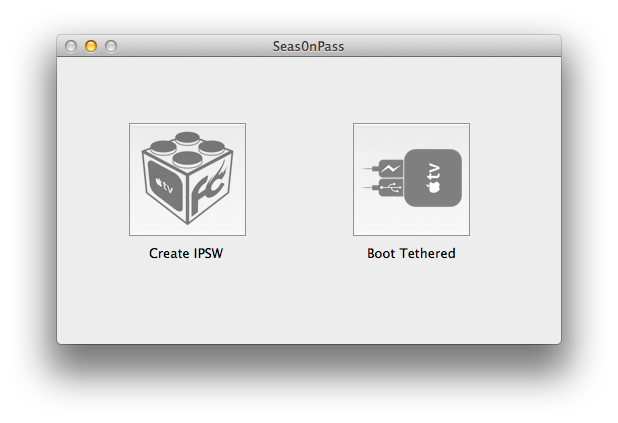
Launch Seas0nPass by double clicking its icon.
Step Two
Select Boot Tethered from the main menu.
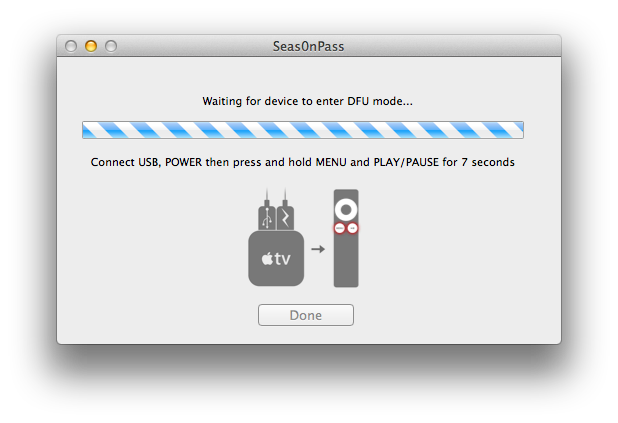
Step Three
Connect the Apple TV to the computer via USB, plug it into the power outlet, and hold MENU and PLAY/PAUSE on the Apple TV remote for 7 seconds.
Step Four
Seas0nPass will detect the device in DFU mode and begin the boot process.
Step Five
Once the tethered boot is complete you can remove the USB cable and connect the HDMI cable to begin using your jailbroken device!